 TulipSoft
 ODBC Connection
What is an ODBC connection?
ODBC (Open Database Connectivity) is a rule for applications to connect to a database management system (DBMS), etc., and retrieve, write, and manipulate data. This rule is set by Microsoft.
To connect to MySQL, you need an ODBC driver for MySQL. Applications that connect to the DB use this mechanism called ODBC to access the DB and input/output data. 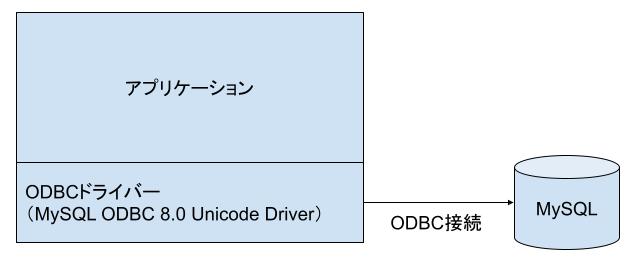
This document describes the installation of the 32-bit version of the ODBC driver for MySQL.
Uninstall
If the 64-bit version of ODBC is already installed, please uninstall it.
Steps: Open Control Panel and select Apps. 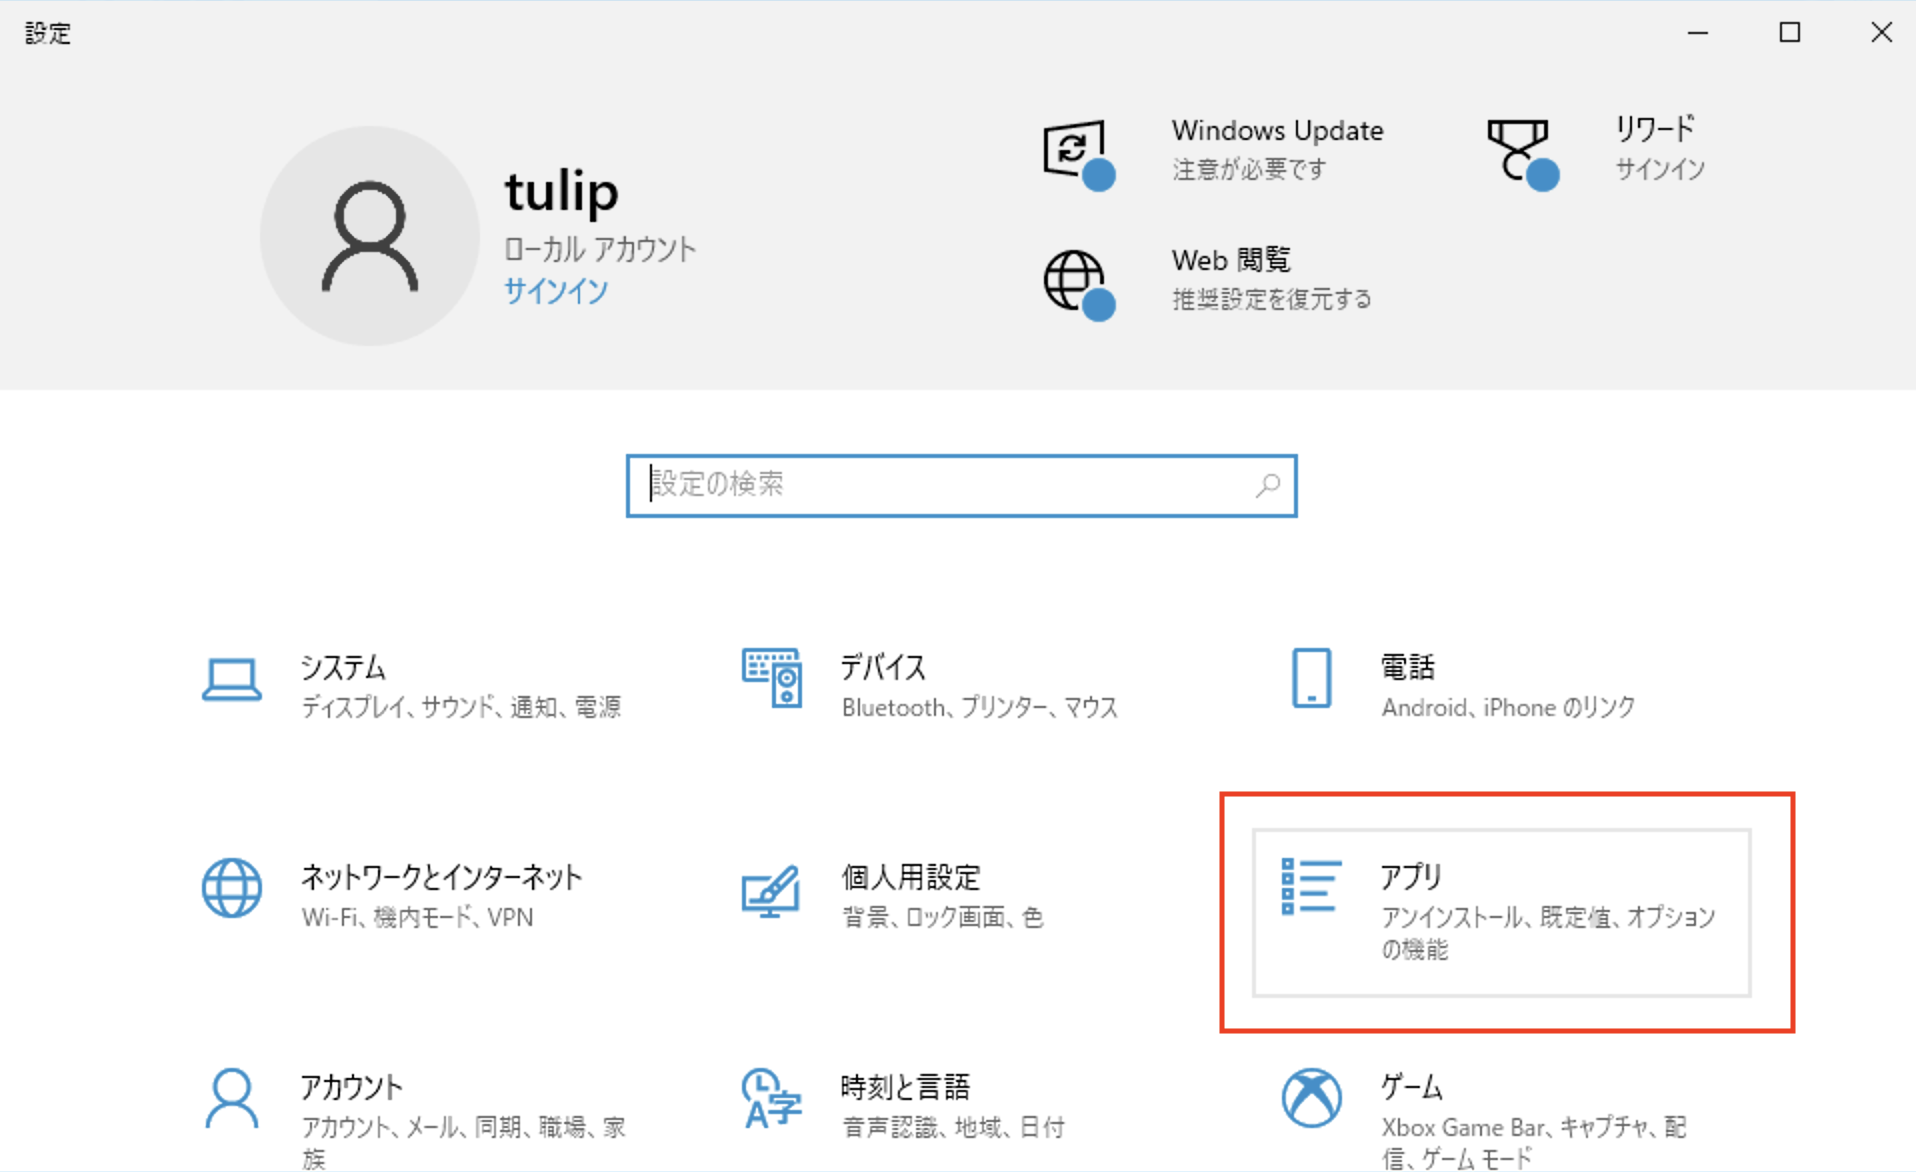
If you search for “odbc”, installed drivers will be displayed, so please uninstall them. 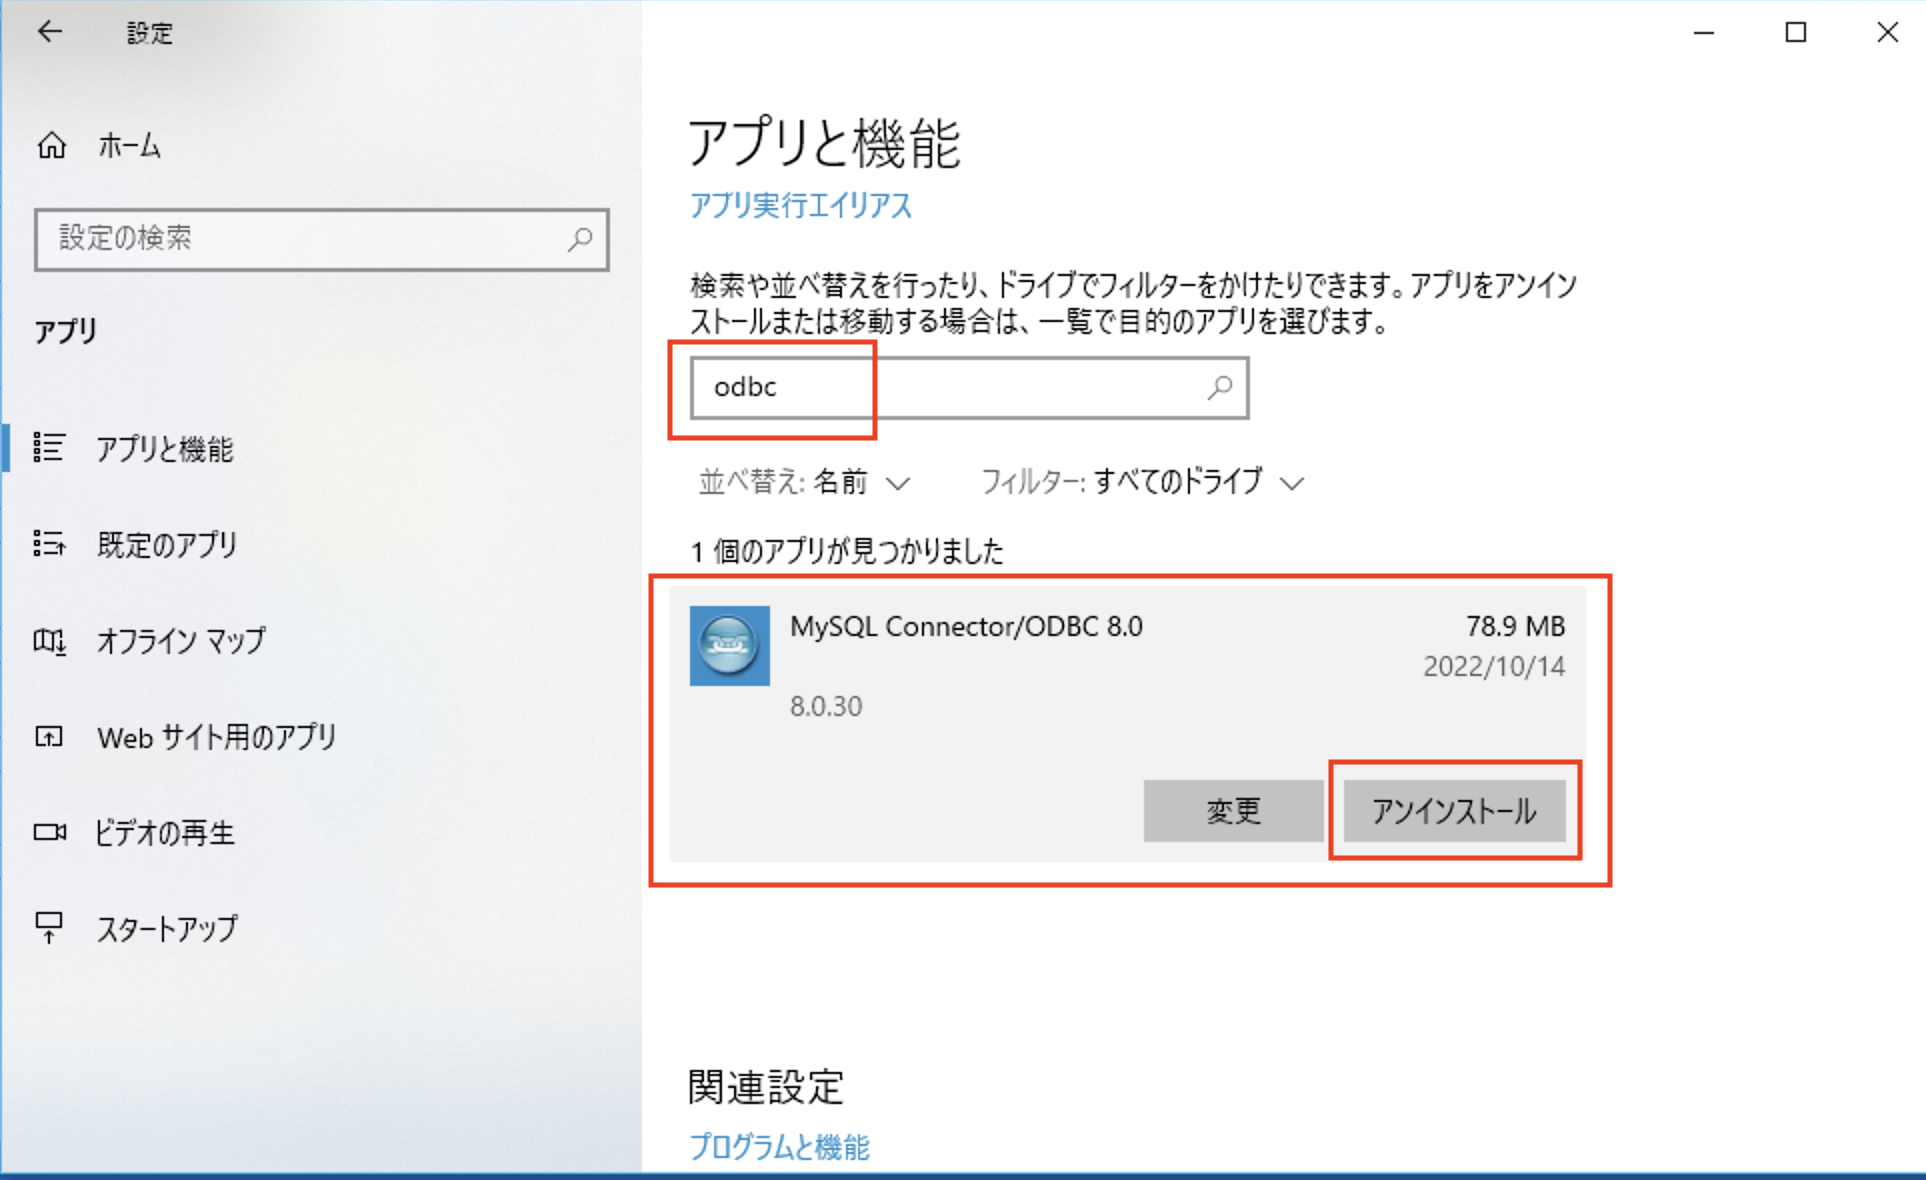
Select “Yes” in the confirmation dialog. 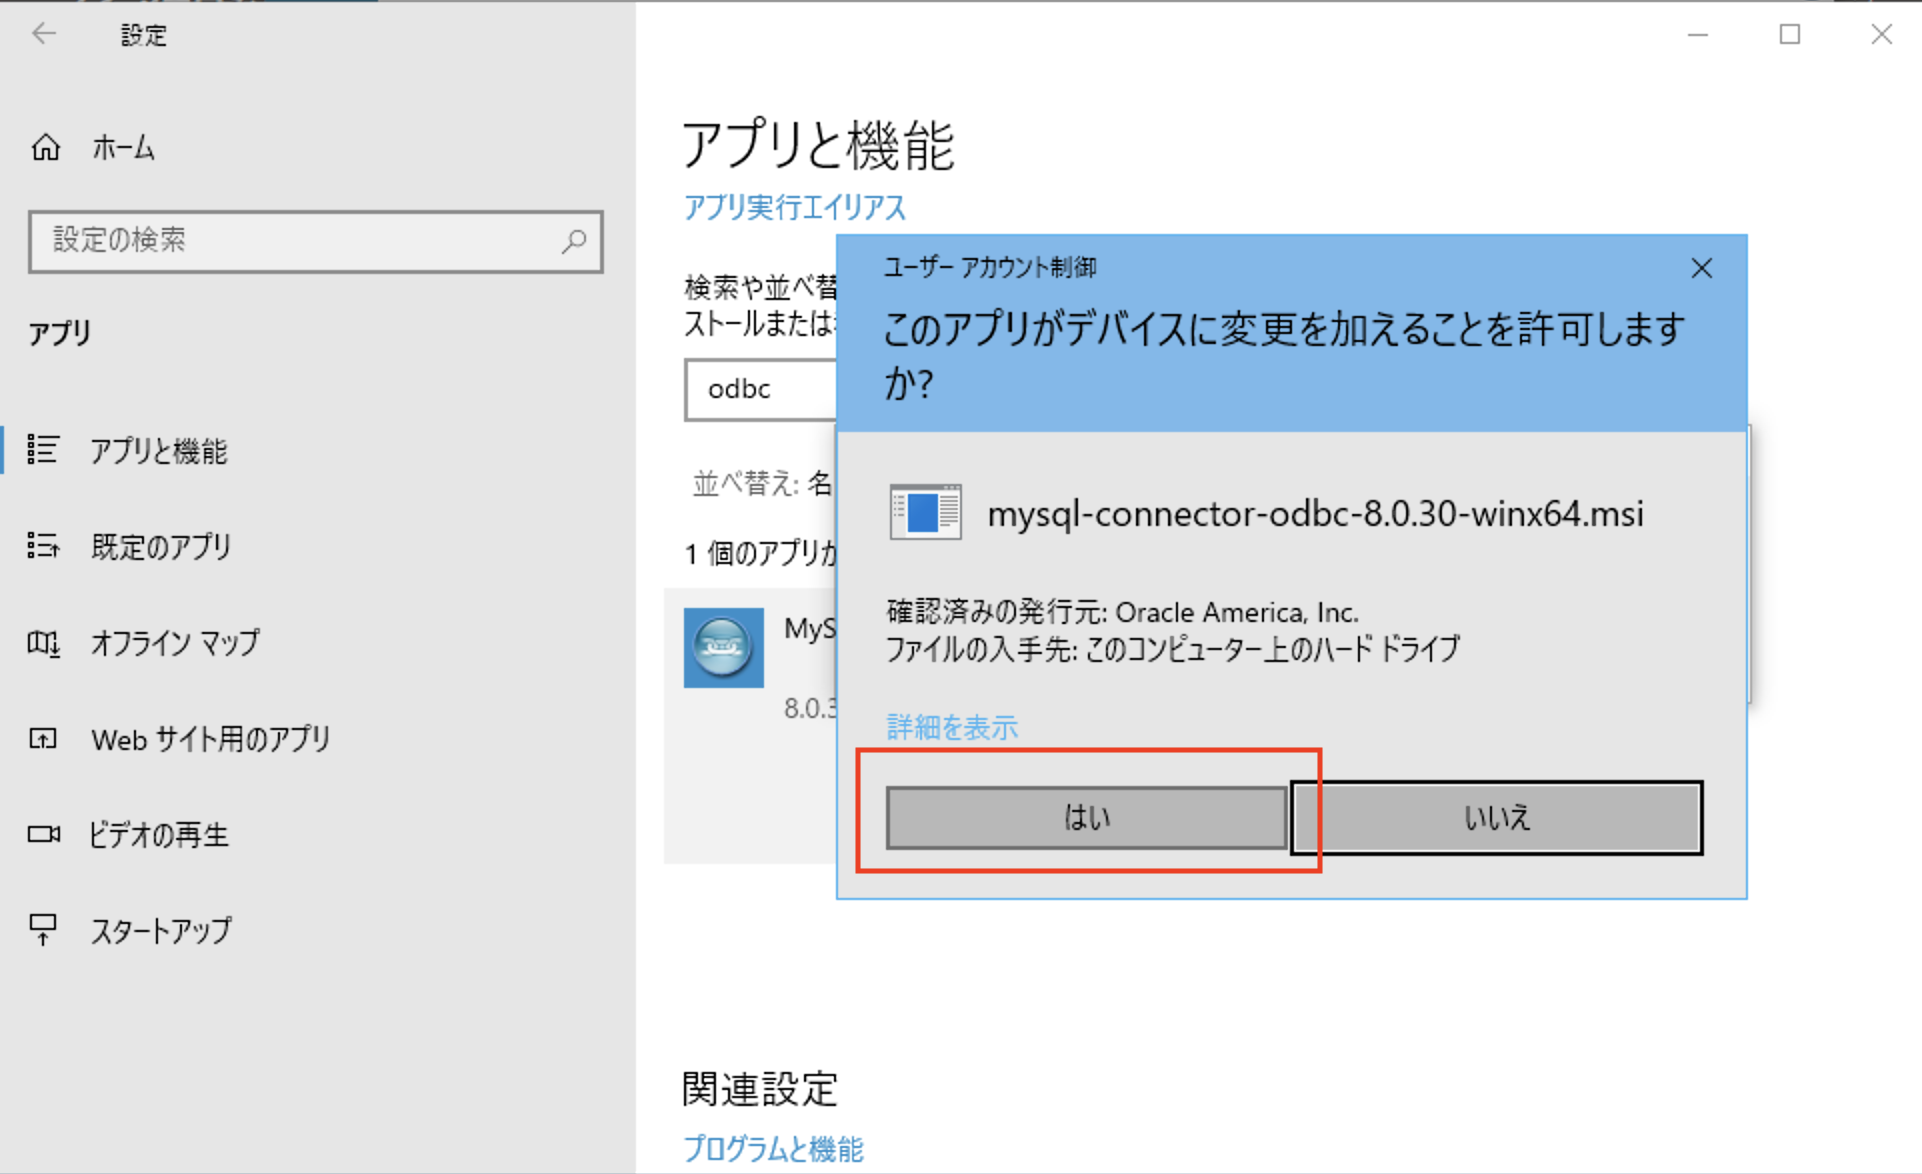
Preparing for ODBC connection
In order to connect MySQL DB and ODBC, download and install the ODBC driver from the MySQL website. The ODBC driver for MySQL can be downloaded from the following page.
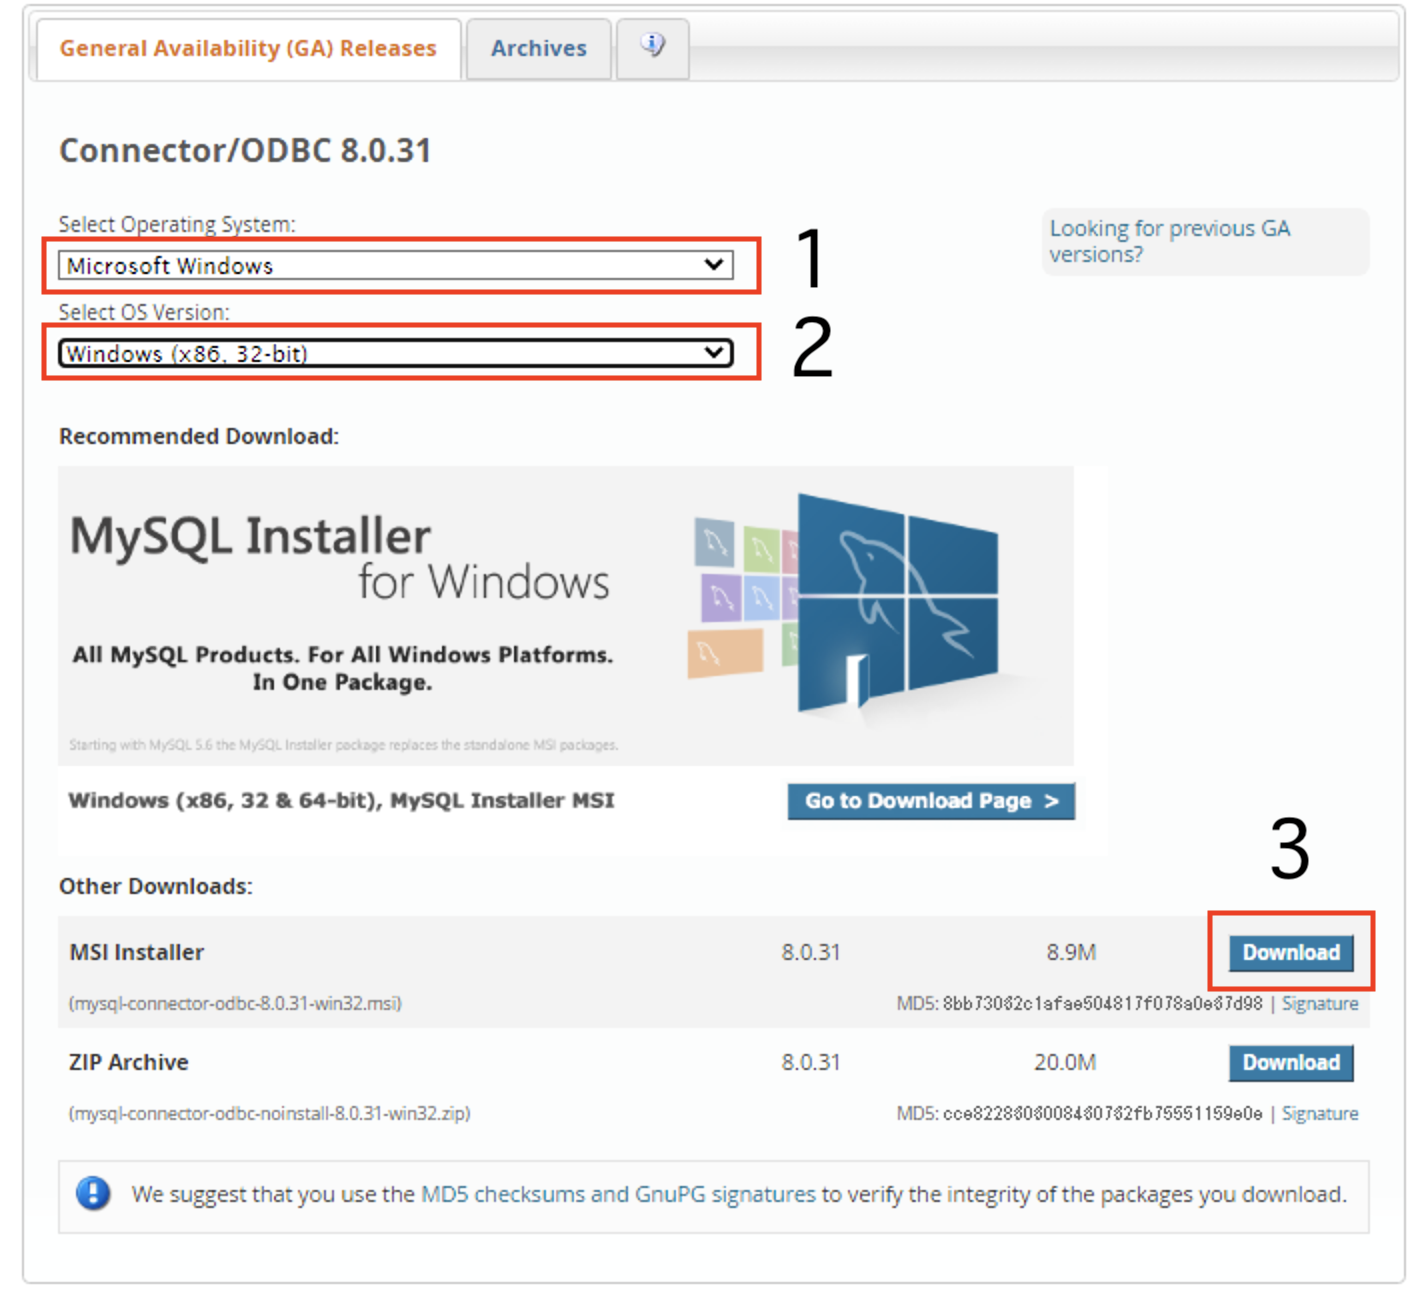
- Under Select Operating System, select “Microsoft Windows”
- Select “x86, 32bit” in Select OS Version
- Click the “Download” button under “MSI Installer” under Other Downloads
- You will be redirected to the download page (if you do not have an Oracle account), select “No thanks, just start my download.” and the download will begin.
installation
Once you have downloaded the ODCB driver above, let’s install it on your development PC (Windows).
-
Open the .msi file.
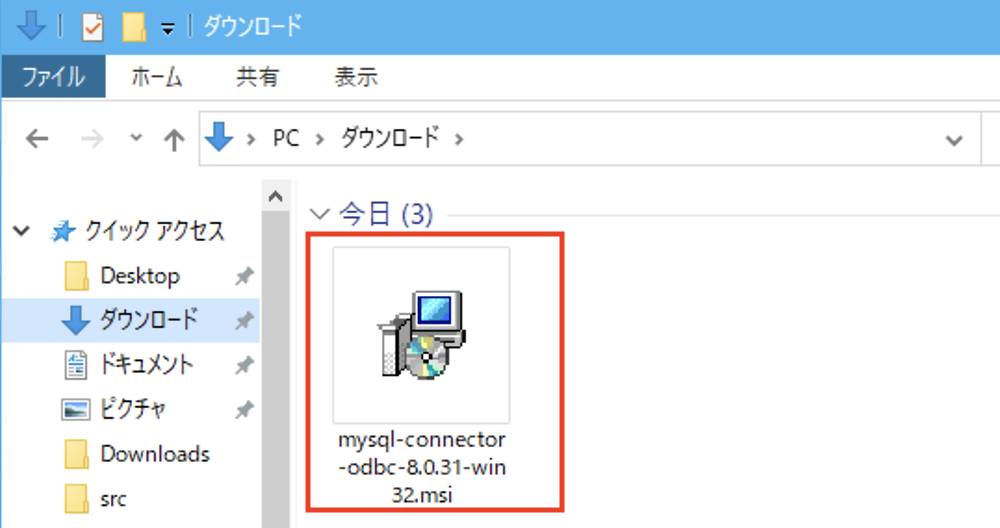
-
If a security warning dialog appears, select Run.
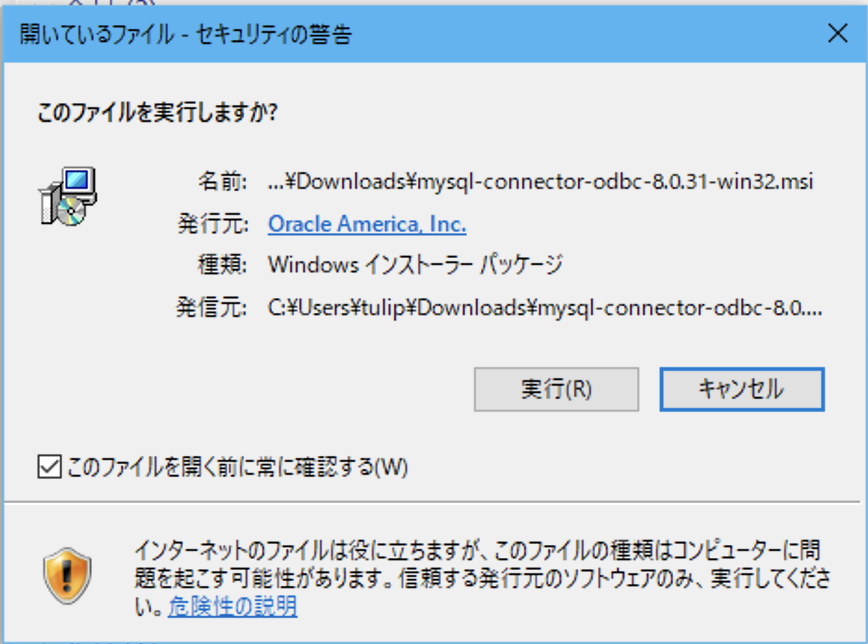
-
If you see a message like “this application requires visual studio 2019 x64 redistributable..”, please download the following files: C++ 再配布可能パッケージ(32bit版)
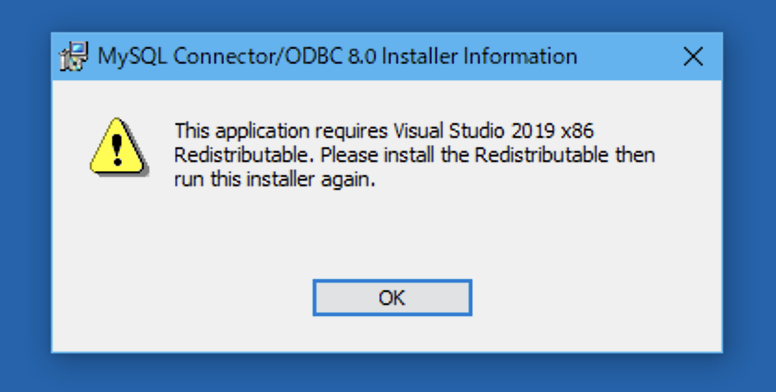 参考- Once downloaded, an exe file will be created, so launch it and install it.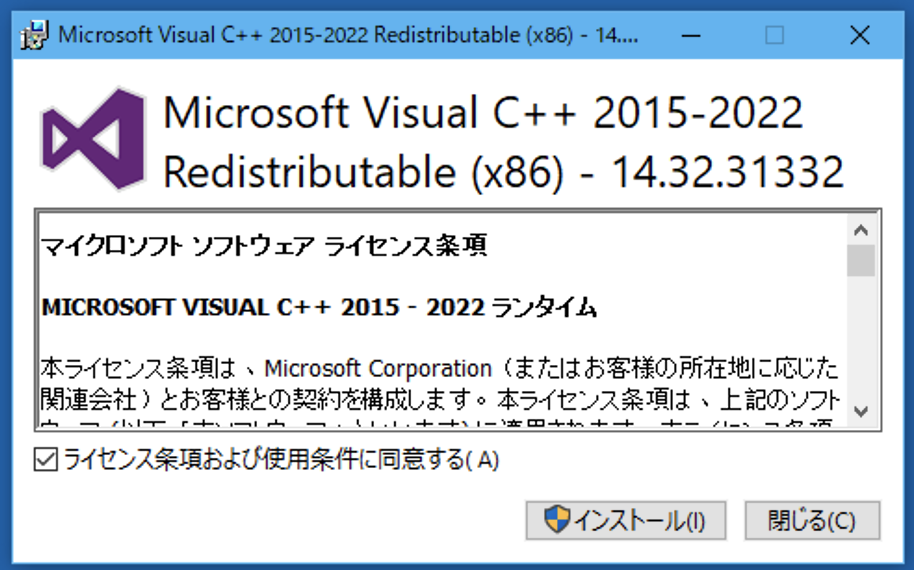
-
Once the installation is complete, proceed from step 1 again.
-
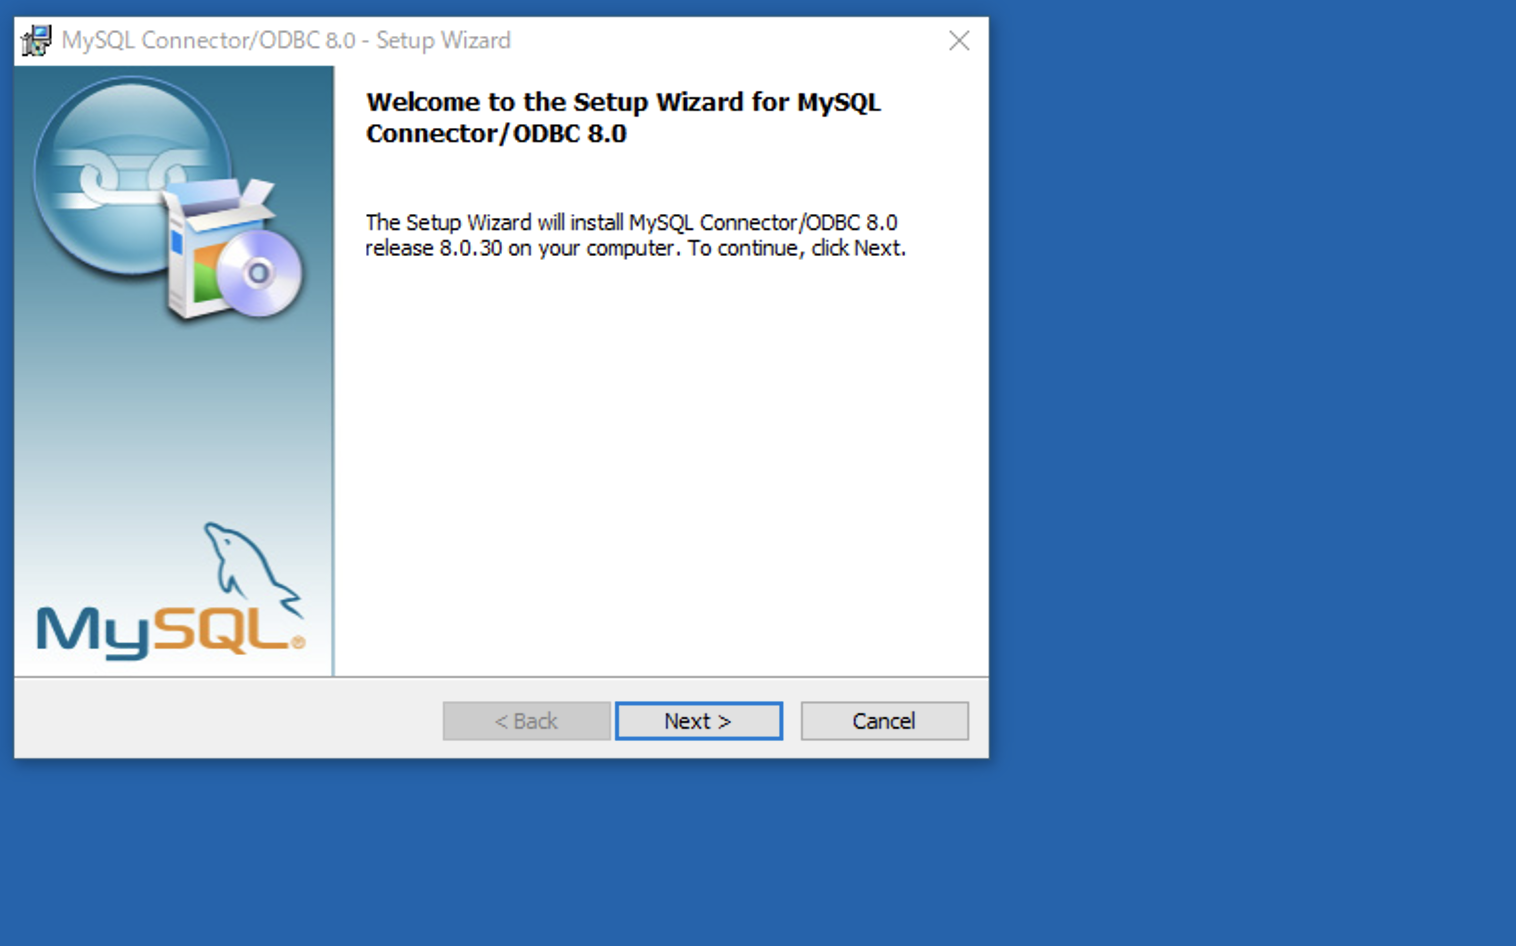
The following screen will appear. Please press Next.
-
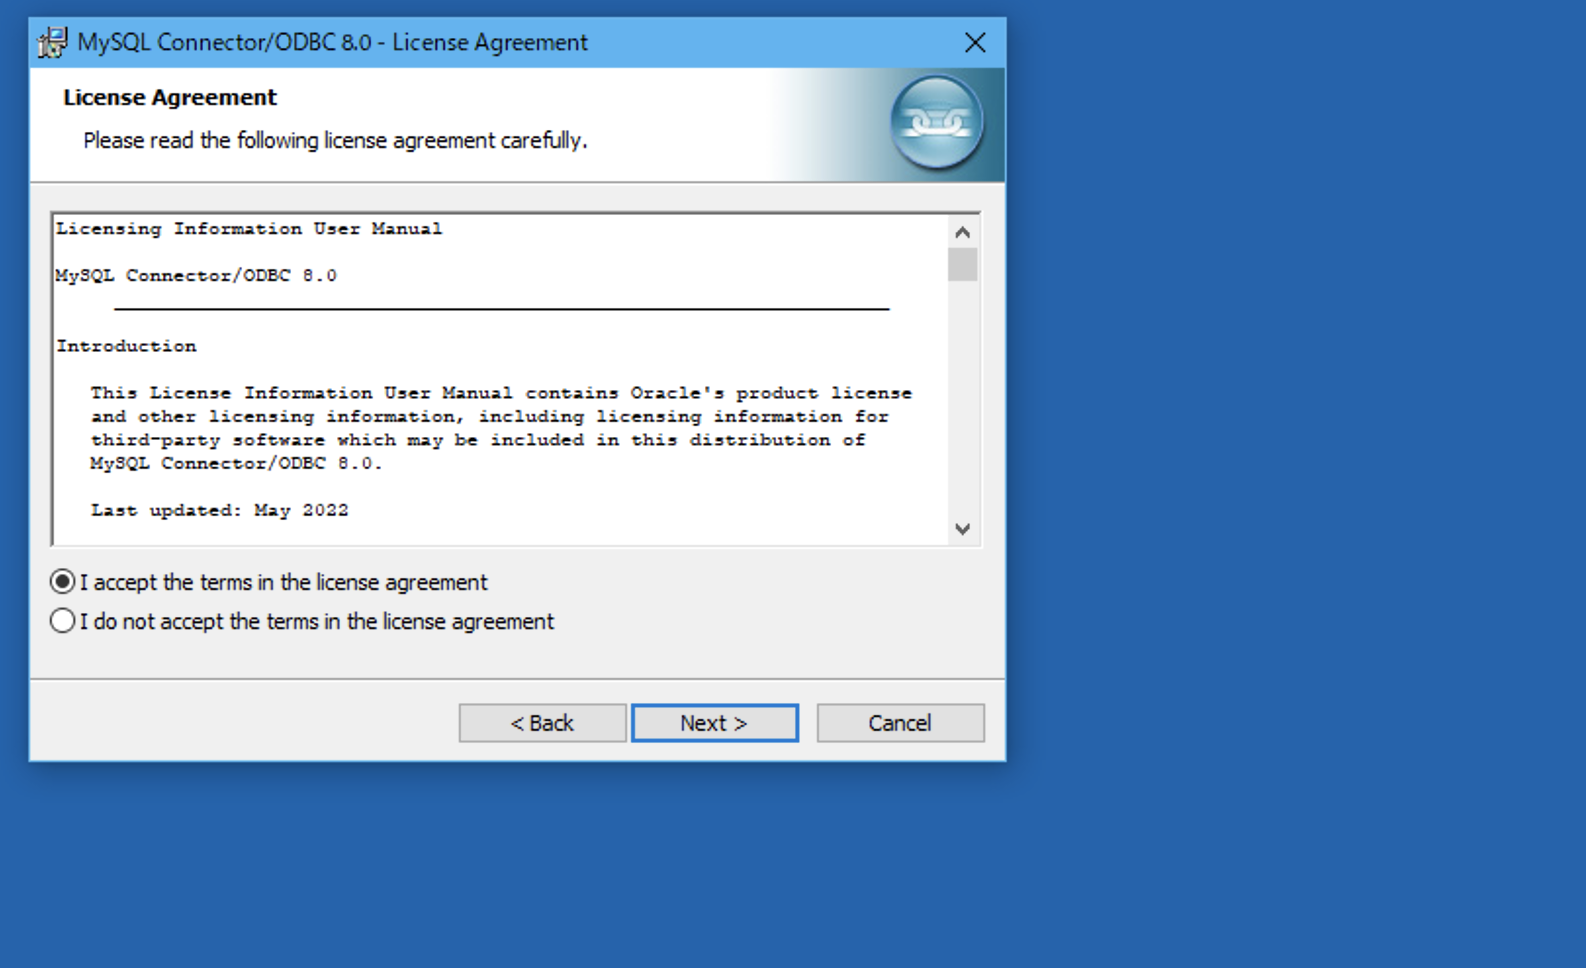
Check the license and press Next.
-
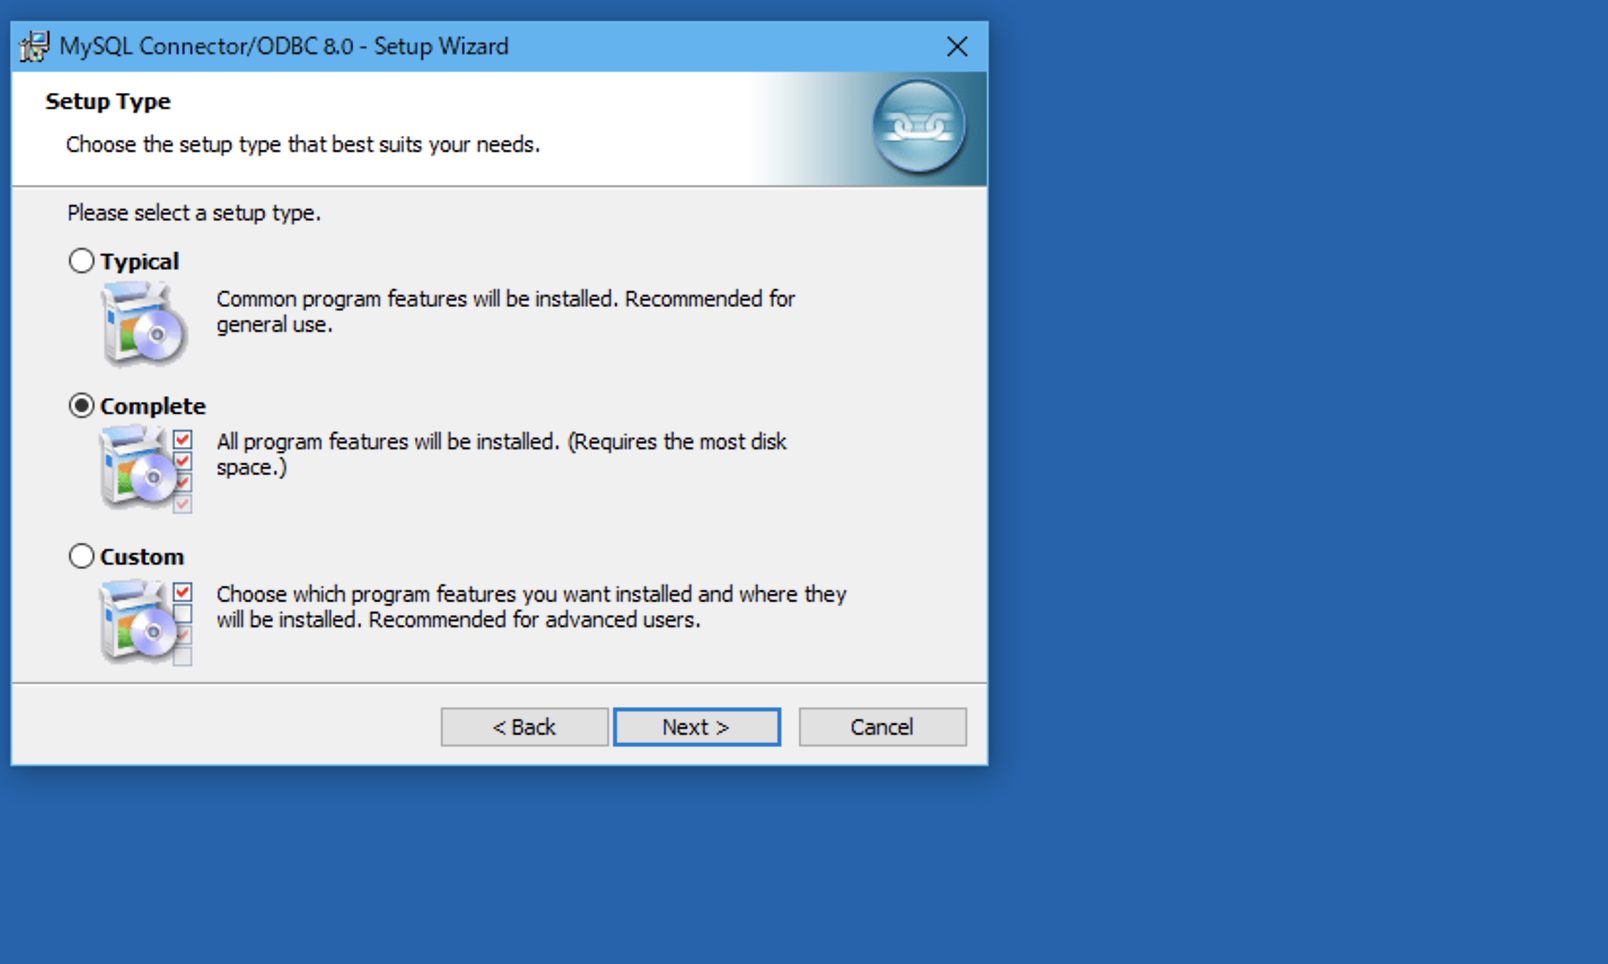
Select Complete for Setup type and press Next.
-
Check the installation details and press Next.
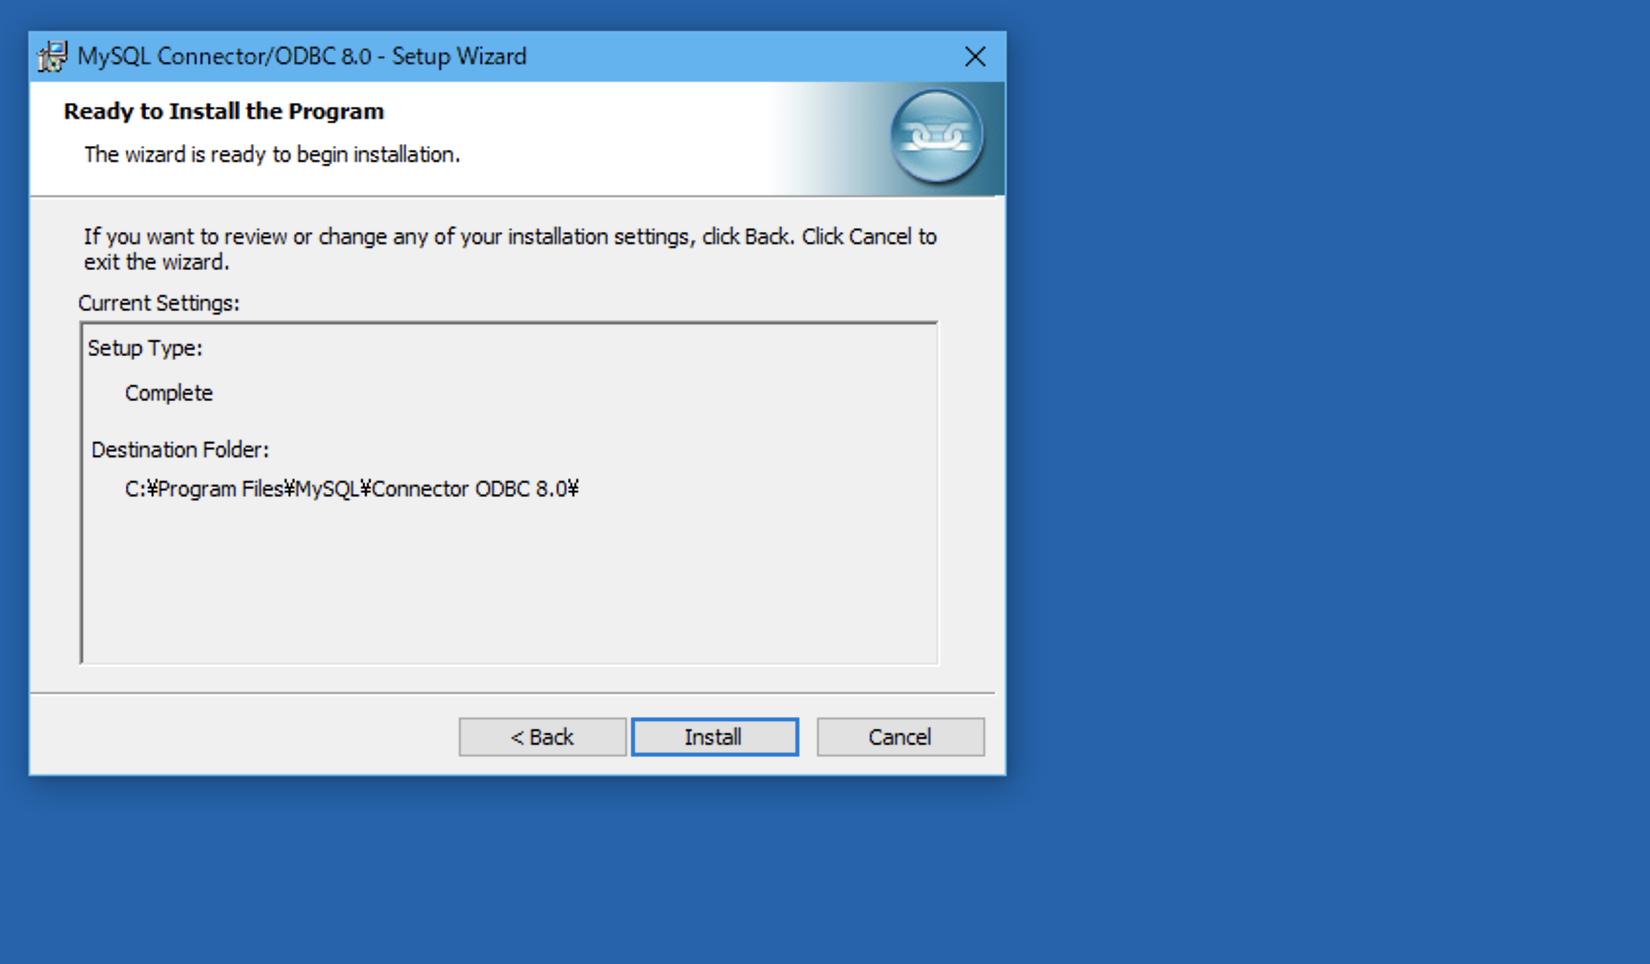
-
Installation is complete. Press the Finish button.
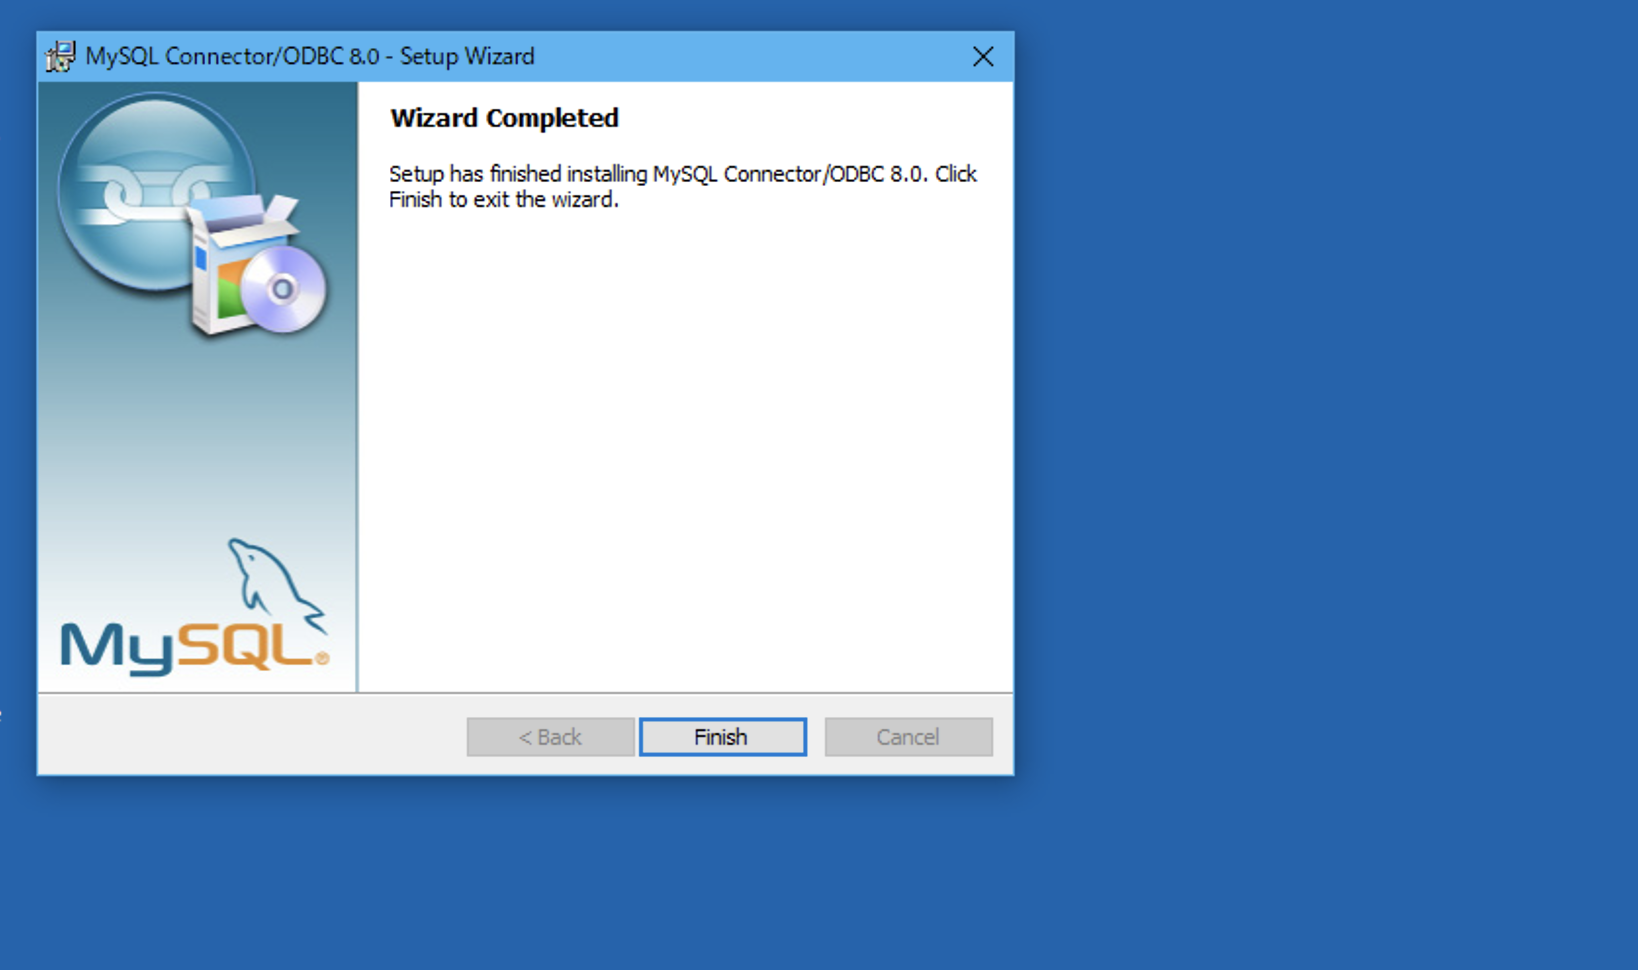
The ODBC driver is now installed.
How to save a DSN
DSN (Data Source Name) is a pre-saved DB connection string such as ID and password required for DB connection. We will show you how to save your DSN.
To save the DSN, press the Windows button, search for “odbc” and select “ODBC Data Source (32-bit)” that appears.
(Please execute the above ODBC 接続準備 in advance) 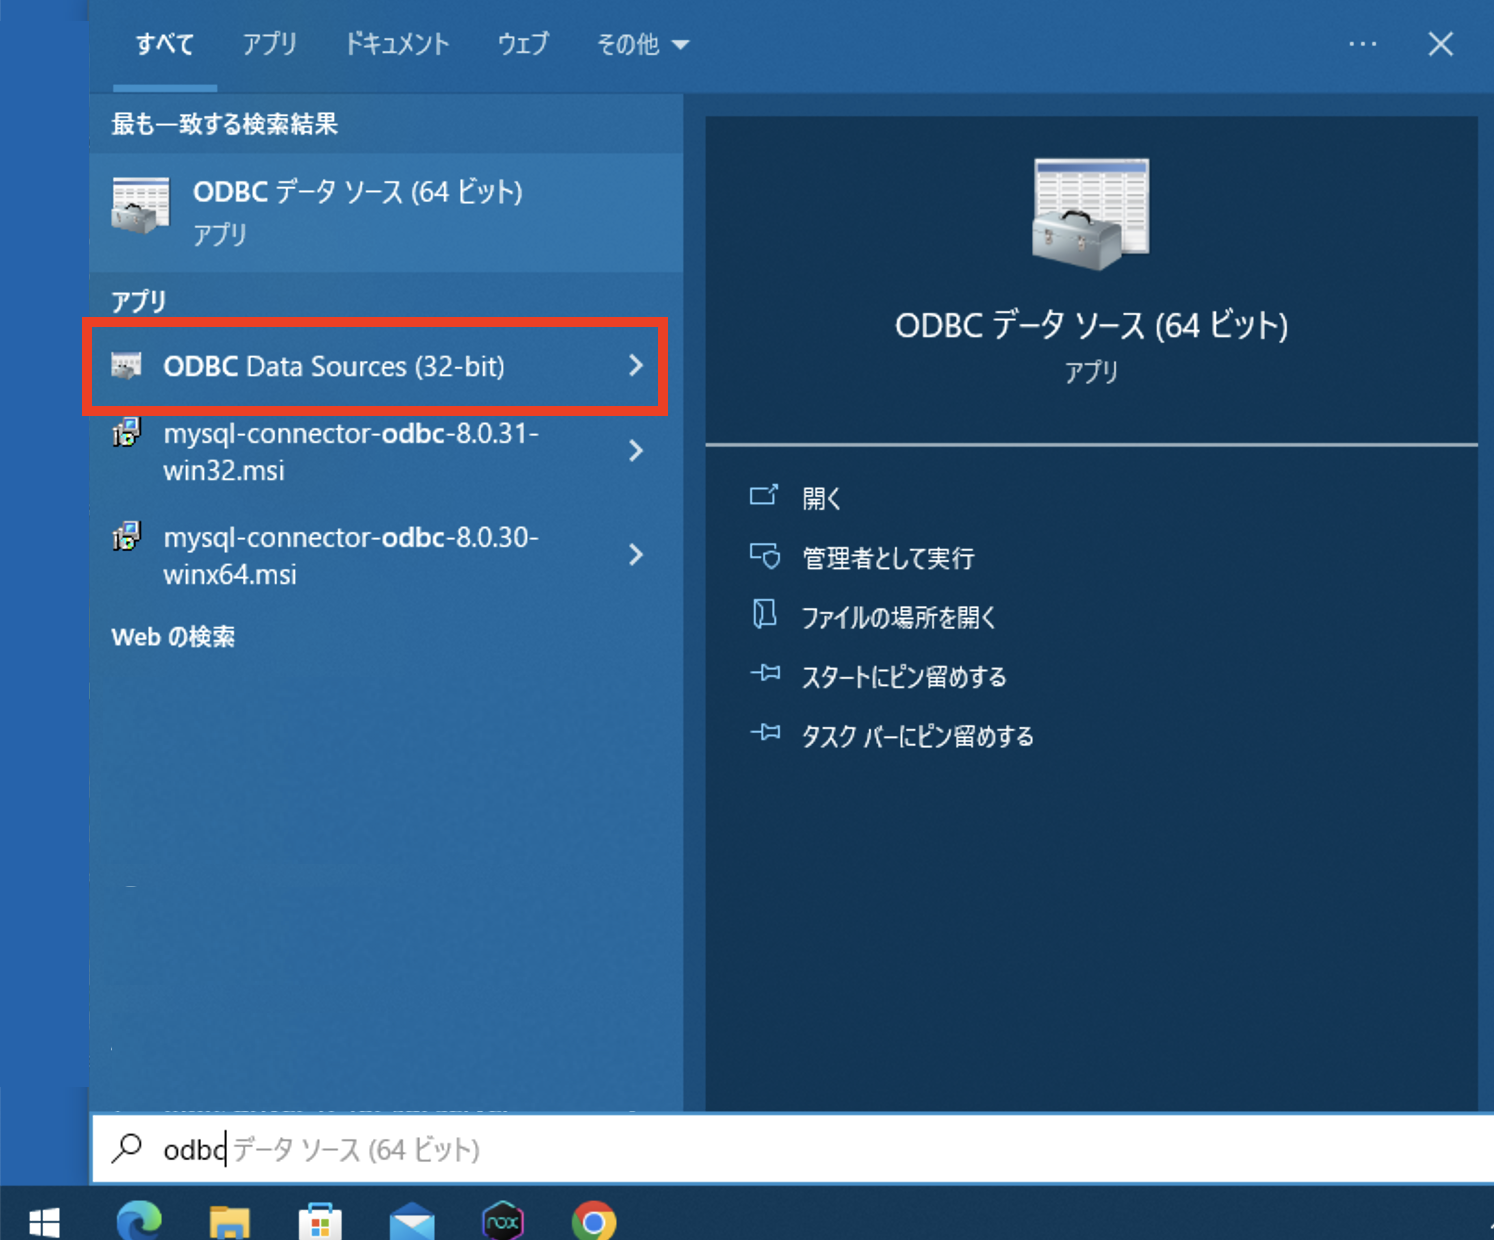
When “ODBC Data Source (32-bit)” starts, the following screen will appear. Select the “System DSN” tab and press the “Add” button. 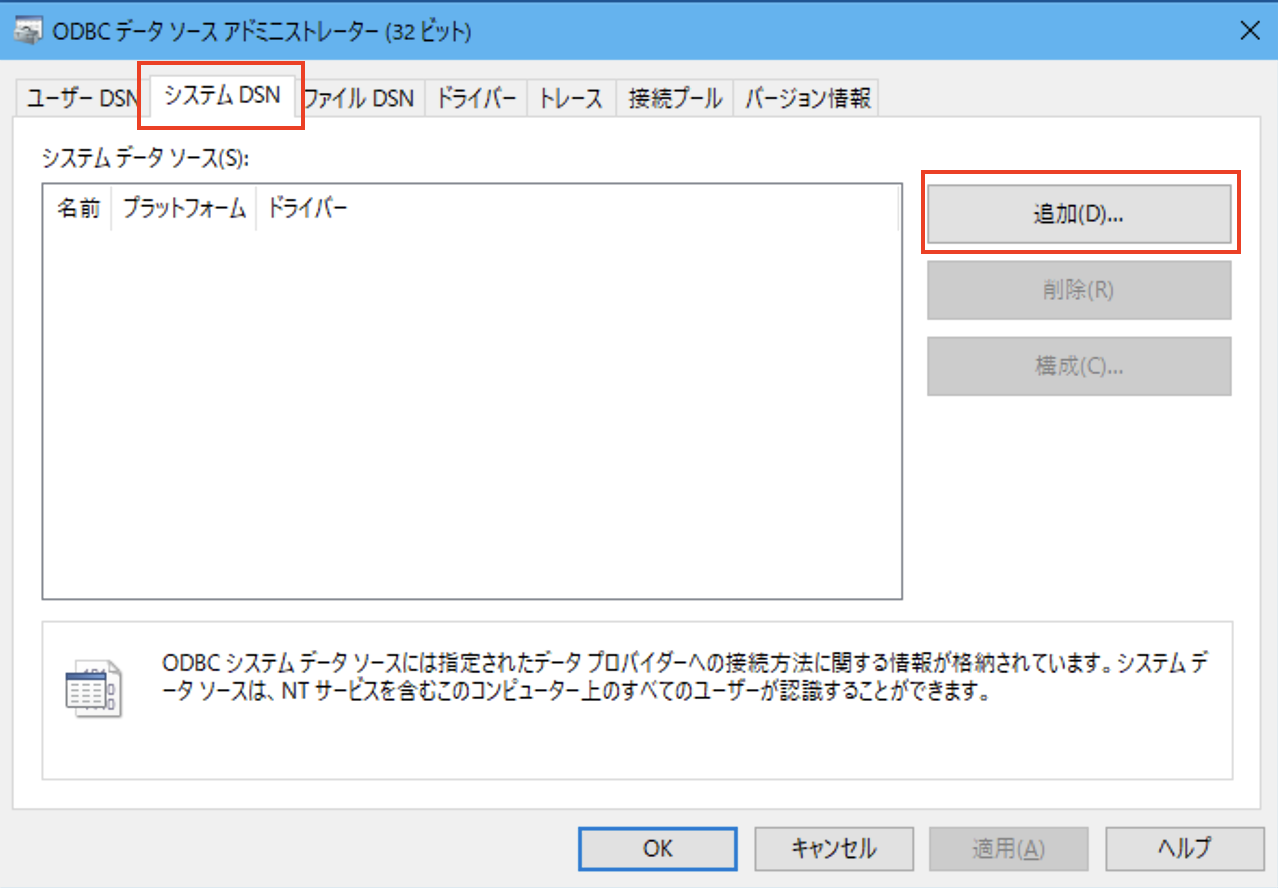
Select “MySQL ODBC 8.0 Unicode Driver” and press the “Finish” button. 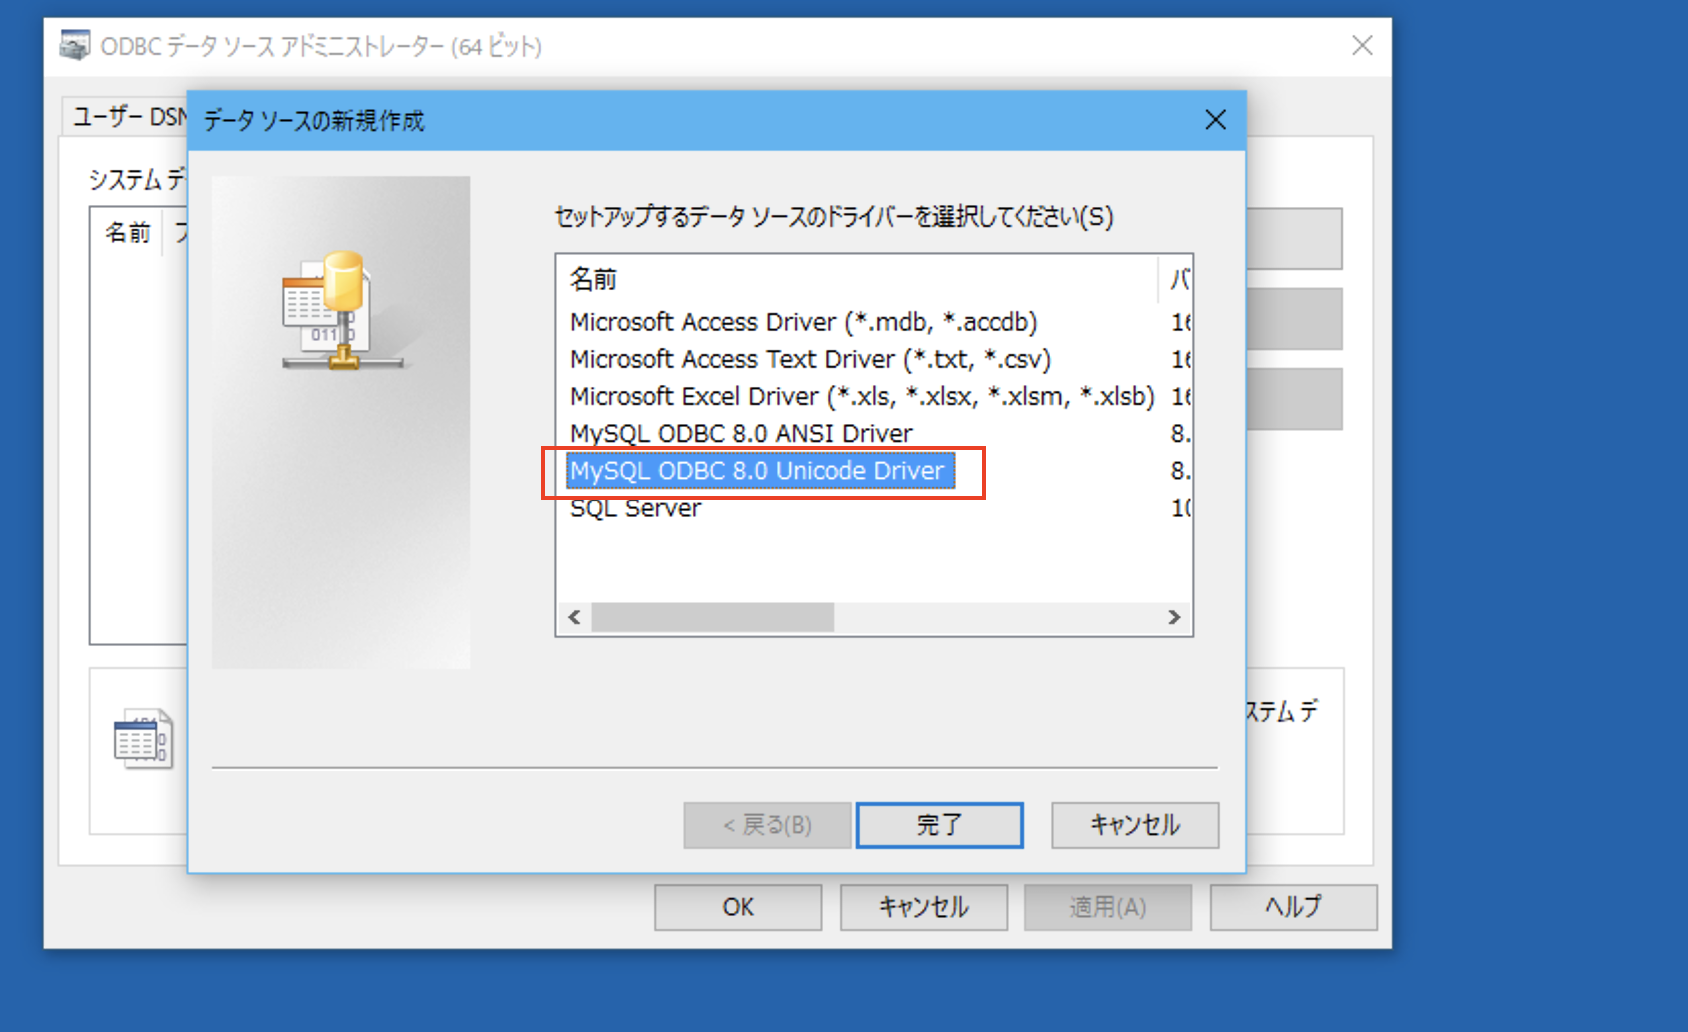
A new connection string registration screen will be displayed, so enter it and press the “OK” button.
- Data Source Name: This is the name of the DSN written in the code when calling from the application. Please feel free to give it an easy-to-understand name.
- Server: IP address of the computer running the MySQL server.
- User: User ID when connecting to the DB. Describe the settings configured on the DB server.
- Password: Password when connecting to the DB. Describe the settings configured on the DB server.
- Database: Connection destination DB name. Describe what was created on the DB server.
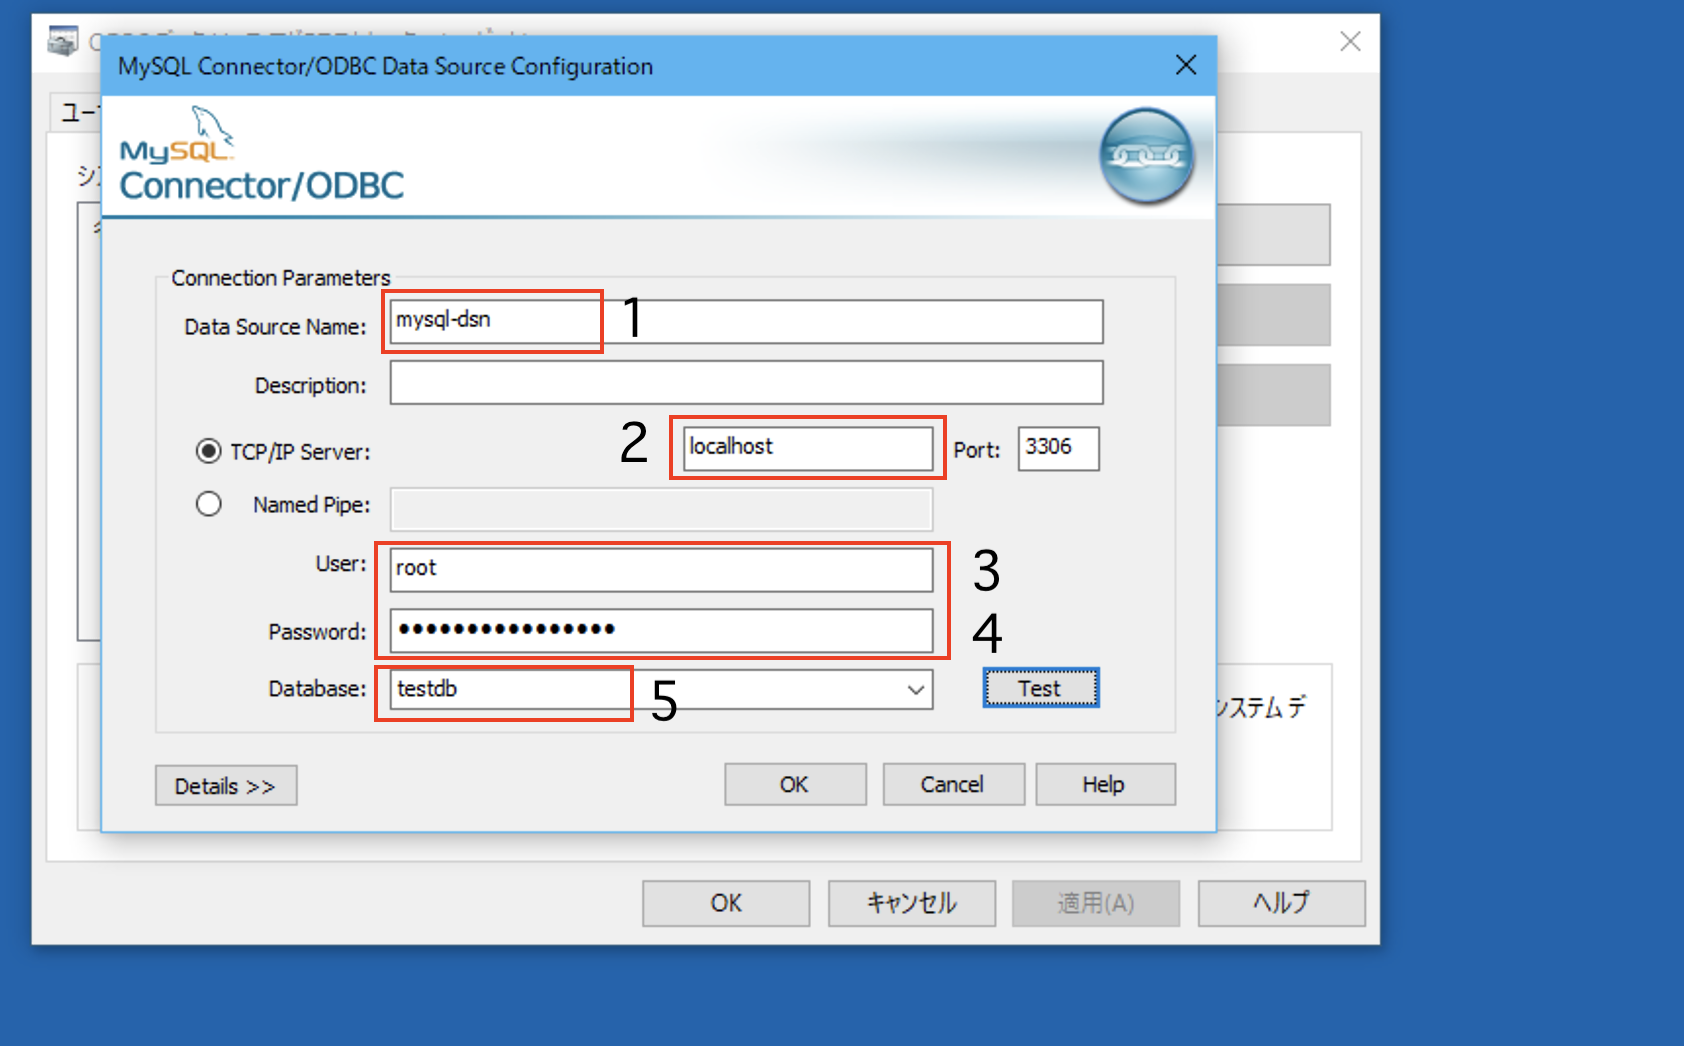
When you press the OK button, the entered information will be registered. In this example, the saved DSN is “mysql-dsn”. If you specify the DSN from the code with this name, the saved contents will be set to the connection string. 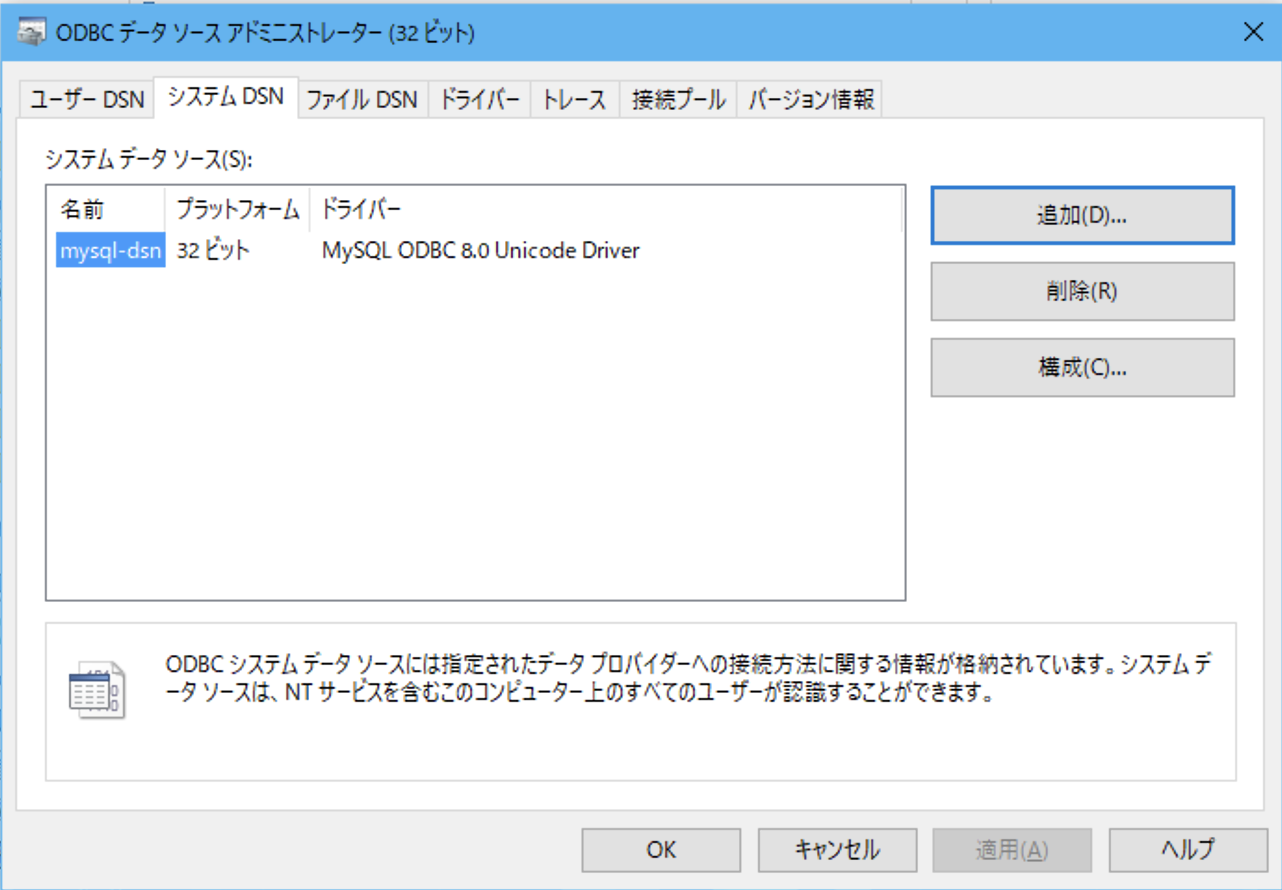
🍵Now you can save the DSN.A working example of an ODBC connection from an application
Here are two ways to connect to MySQL using an ODBC connection from your application.
- Connection without DSN
- Connection using DSN
In the sample below, change the necessary parts such as the ID, save it to a file with an editor, and double-click the icon to run it.
testDB is required in advance. Please prepare in advance from the following materials.
“testDB” table: https://tulipsoft.com/reference/docs/sql/createdb/ “test” table: https://tulipsoft.com/reference/docs/sql/createtable/
Connection without DSN
This is a method to write and execute all the DB connection strings necessary for DB connection, such as ID and password, in code.
Below is the sample code. When you run the code, the Driver, Server information, etc. specified in the code will be added to the connection string. After that, it connects to the DB, retrieves data from the specified table, and displays it in a message box.
On line 15, the connection string is set in a variable and used when connecting to the DB.
Filename: bydriver.vbs
| |
Connection using DSN
The way to call a DSN is to call a previously saved DSN when executing the code. The differences from the above 接続文字列を全てコードに記述 are as follows.
< td>Write everything in code| Item | Connection without DSN | Connection with DSN |
|---|---|---|
| DB connection string | Write and call in DSN | |
| Share between applications | × | ◯ |
With a connection that does not use a DSN, the entire DB connection string is written and embedded within the application, whereas with a method that uses a DSN, it is read from a DSN that has been saved in advance outside the application. A connection using a DSN can be used by multiple applications on a computer.
Below is a sample code for connecting using DSN.
On the third line, save the previously saved DSN in a variable.
The DSN saved in line 9 is set as the connection string.If the DB connection is successful, the record is retrieved on line 13.
Filename: bydsn.vbs
| |